Flutter iOS 프로젝트 Fastlane과 GitHub Actions를 사용해서 Firebase App Distribution 배포하기
- fastlane: iOS 및 Android 앱의 빌드와 출시를 자동화하는 오픈소스 플랫폼
- GitHub Actions: CI/CD 파이프라인을 자동화하는 플랫폼
- Firebase App Distribution: 앱 배포 서비스
1. MAC 환경에서 Ruby 설치
brew install ruby

# zsh 환경에서 설치한 Ruby 경로 추가
echo 'export PATH="/usr/local/opt/ruby/bin:$PATH"' >> ~/.zshrc
source ~/.zshrc

# fish 환경에서 설치한 Ruby 경로 추가
echo 'set -gx PATH /usr/local/opt/ruby/bin $PATH' >> ~/.config/fish/config.fish
source ~/.config/fish/config.fish
2. Fastlane 설치
brew install fastlane3. Flutter ios 프로젝트에서 Fastlane 초기화
cd ios
fastlane init
3-1. 4. Manual setup - manually setup your project to automate your tasks 선택
itc_team_id는 App Store Connect에 로그인 상태에서 https://appstoreconnect.apple.com/WebObjects/iTunesConnect.woa/ra/user/detail 페이지에서 contentProviderId 값을 입력
Appfile
apple_id("test@example.com") # Your Apple email address
team_id("TEAM_ID")  # Developer Portal Team ID
itc_team_id("ITC_TEAM_ID") # App Store Connect Team ID

for_platform :ios do
  for_lane :development do
    app_identifier("com.example.app.dev")
  end
end
4. match 설정
4-1. Provisioning Profile을 저장할 깃허브 레포지토리 생성
fastlane match init4-2. git 선택 후 github 레포지토리 주소 입력
Matchfile
git_url("https://github.com/your-github-username/your-repo-name")
storage_mode("git")
username("Apple ID")

for_platform :ios do
  for_lane :development do
    type("adhoc")
    app_identifier("com.example.app.dev")
  end
end
4-3. Provisioning Profile 생성
이때 입력한 password 값을 Github Actions에서 사용할 수 있도록 Flutter 프로젝트 깃허브 레포지토리 GitHub secrets에 MATCH_PASSWORD 이름으로 추가 (이후 다른 개발자에게 프로비저닝 프로필 공유시에도 사용함으로 따로 기억해두어야함)
fastlane match development -a com.example.app.dev # 로컬에서 개발시 디버그 모드 사용
fastlane match adhoc -a com.example.app.dev # App Distribution 배포 시 사용
4-4. Github Actions에서 Provisioning Profile이 저장된 깃허브 레포지토리에 접근할 수 있도록 개발용 공용 깃허브 계정에서 github personal access Token 생성
- 만료일 없는 workflow 권한을 체크하여 생성
- Flutter 프로젝트 깃허브 레포지토리
GitHub secrets에 아래 명령어를 사용해 GitHub authentication token을 Base64로 인코딩하여MATCH_GIT_BASIC_AUTHORIZATION이름으로 추가
echo -n your_github_username:your_personal_access_token | base644-5. Xcode에서 Provisioning Profile 설정
Xcode > TARGETS - Runner > Signing & Capabilities 에서 Automatically manage signing 체크 해제 후 Provisioning Profile 설정
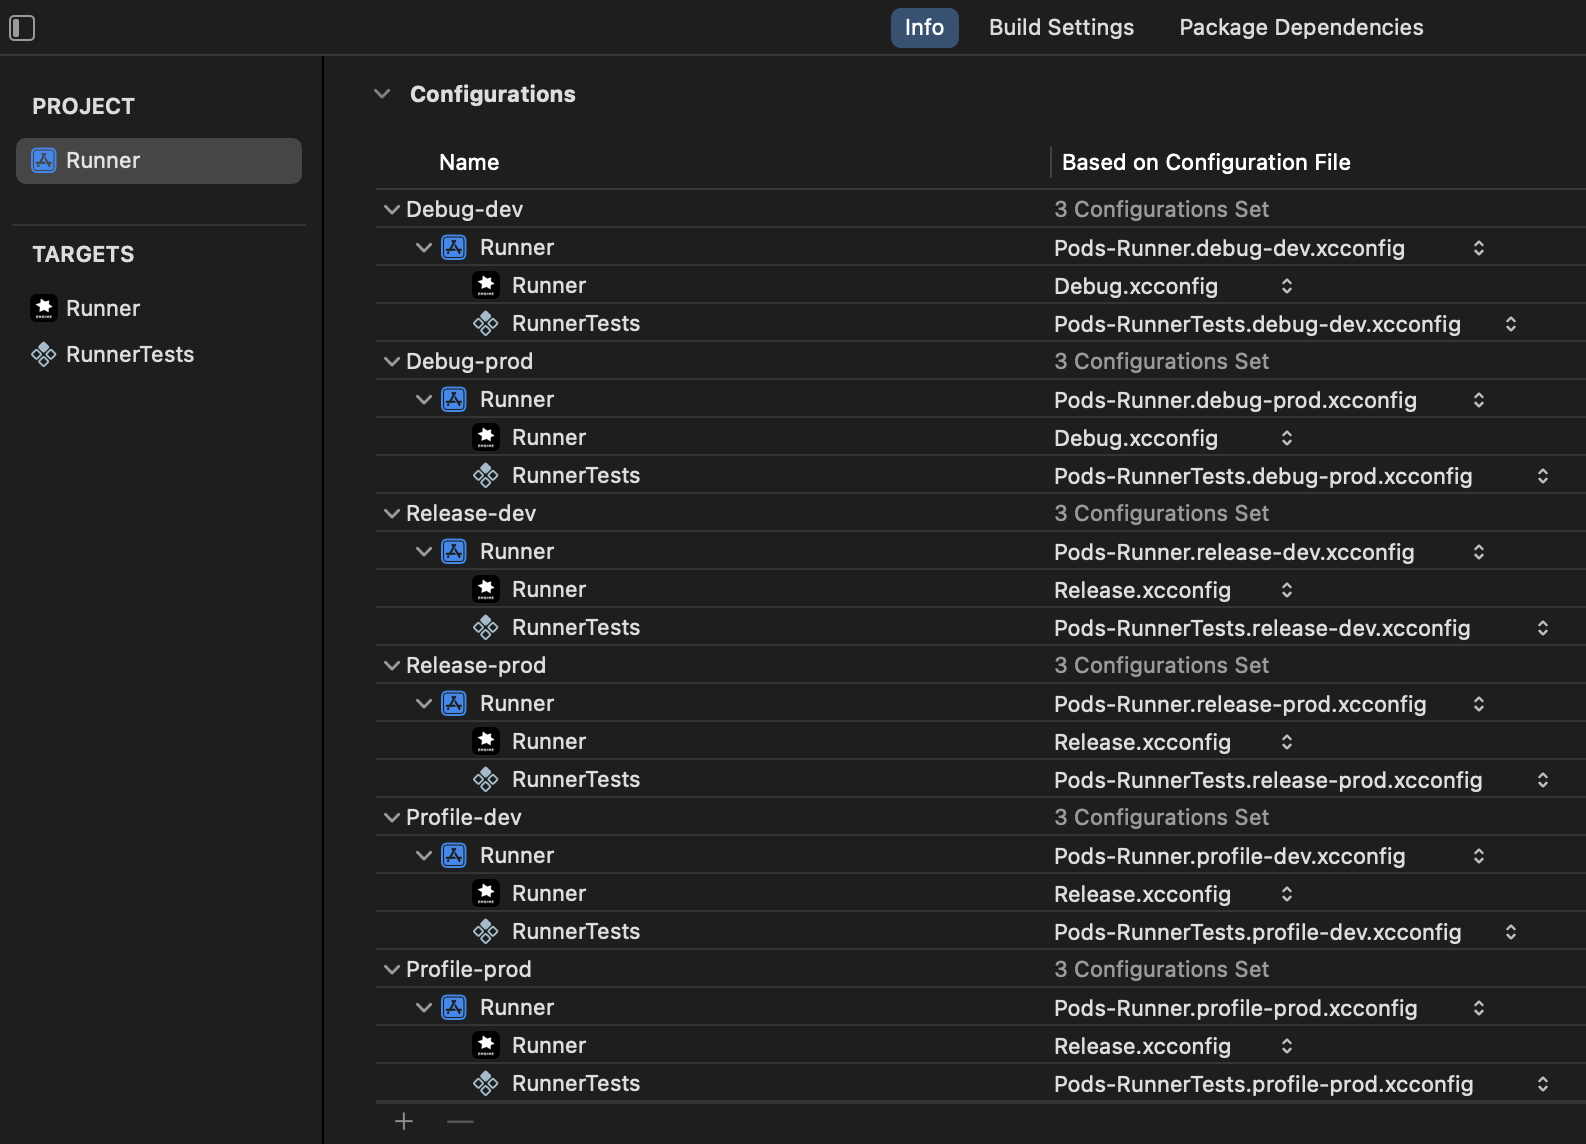
- Debug-dev -> match development com.example.app.dev
- Release-dev -> match adhoc com.example.app.dev
- Profile-dev -> match adhoc com.example.app.dev
5. Firebase app distribution plugin 설치
fastlane add_plugin firebase_app_distribution6. Firebase App Distribution 업로드용 GCP Account 생성
6-1. Firebase Console에서 프로젝트 설정 → 서비스 계정 이동
6-2. 서비스 계정 만들기 버튼 클릭
6-3. 서비스 계정 이름 입력 후 만들고 계속하기 버튼 클릭
6-4. Firebase 앱 배포 관리자 역할 선택
6-5. 완료 버튼 클릭
6-6. 서비스 계정 선택 후 키 탭 클릭
6-7. 키 추가 버튼 클릭 후 키 유형 JSON 선택 후 만들기 버튼 클릭
6-8. 서비스 계정 키를 다운받아 /ios/fastlane 경로에 저장 후 파일 이름을 google-service-account.json 으로 변경(로컬 환경에서 fastlane 실행 시 사용하기 위함)
6-9. .gitignore 파일에 google-service-account.json 추가 (깃허브 레포지토리에 올리지 않기 위함)
6-10. GitHub secrets에 Google Service Account JSON 파일 내용을 GOOGLE_SERVICE_ACCOUNT_DEV 이름으로 추가
7. Fastfile 파일 수정
Fastfile
default_platform(:ios)

platform :ios do
  desc "개발 환경 Firebase App Distribution 배포"
  lane :development do |options|
    release_notes = options[:release_notes] || ""

    setup_ci()

    match(
      type: "adhoc",
      app_identifier: "com.example.app.dev",
      force_for_new_devices: true,
    )

    build_app(
      workspace: "Runner.xcworkspace",
      scheme: "dev",
      export_method: "ad-hoc",
    )

    firebase_app_distribution(
      app: "FIREBASE_APP_ID",
      service_credentials_file: "fastlane/google-service-account.json",
      release_notes: release_notes,
      # testers: "qa@example.com",
      # groups: "TESTER_GROUP_NAME",
      debug: true,
    )
  end
end
8. GitHub Actions 설정
name: Deploy Development App to Firebase App Distribution

on:
  push:
    branches:
      - develop

jobs:
  deploy-ios:
    runs-on: macos-latest

    env:
      GOOGLE_SERVICE_ACCOUNT_DEV: ${{ secrets.GOOGLE_SERVICE_ACCOUNT_DEV }}

    steps:
      - name: 📚 Git Checkout
        uses: actions/checkout@v4

      - name: 🔧 Xcode 버전 설정
        uses: maxim-lobanov/setup-xcode@v1
        with:
          xcode-version: 16.2

      - name: 🐦 Flutter 설치
        uses: subosito/flutter-action@v2
        with:
          channel: stable
          flutter-version: 3.32.0

      - name: 📦 의존성 설치
        run: flutter pub get && cd ios && pod install

      - name: 🔧 Ruby 버전 설정
        uses: ruby/setup-ruby@v1
        with:
          ruby-version: 3.3.0
          bundler-cache: true
          working-directory: ios

      - name: 🔧 Fastlane 설치
        run: brew install fastlane

      - name: 🔑 서비스 계정 키 파일 생성
        working-directory: ios/fastlane
        run: echo "$GOOGLE_SERVICE_ACCOUNT_DEV" > google-service-account.json

      - name: 📝 릴리즈 노트 생성
        shell: bash
        run: |
          {
            echo 'RELEASE_NOTES<<__GHA_NOTES__'
            jq -r '. // [] | .[] | "- " + .message' <<< '${{ toJson(github.event.commits) }}'
            echo '__GHA_NOTES__'
          } >> "$GITHUB_ENV"

      - name: 🚀 Firebase App Distribution 배포
        working-directory: ios
        env:
          MATCH_PASSWORD: ${{ secrets.MATCH_PASSWORD }}
          MATCH_GIT_BASIC_AUTHORIZATION: ${{ secrets.MATCH_GIT_BASIC_AUTHORIZATION }}
        run: |
          bundle exec fastlane ios development \
            release_notes:"$RELEASE_NOTES"